Proxmox Update Pt 2 – The HBA Strikes Back


One goal of updating to Proxmox was to be able to run TrueNAS Core as a VM, which would then have my NAS in a ZFS Pool. To do this, there are multiple ways to pass hard drives from Proxmox to the TrueNAS VM – the two I looked at were passing the drives directly or passing the drive controller. Passing the controller has some benefits, it will pass all drives attached to the HBA (host bus adapter), and it should be possible to hot swap drives while working in TrueNAS without having to pass every single one (spoiler alert, hot swap works great!). 


So, the last place we left off was with a properly installed version of Proxmox on the server. The next thing to do is set up a VM for TrueNAS Core. I had the VM already on my current NAS, so I named it, chose my NAS share and picked the file for the ISO I wanted. On the next tab was some important settings:

I read that the Machine works best as q35. Eventually, the finished working version had this as the setting. Also, the BIOS was UEFI – again, the version I got working had this as the setting. This did cause some problems initially, but we’ll get there later. I’m not sure if choosing SeaBIOS will work here. I added the EFI disk (my main VM storage), checked the Qemu agent, and hit next. The next page, I also chose vmstorage0 for the main storage of the VM. I chose the number of cores, RAM, and network settings, and I was done. Settings below:


Next thing, before passing the HBA (and drives), was to check if the VM worked.
Narrator: It did not.


I went through a lot of trouble here, but the basic issue was it failed to load the ISO. After a ton of searching, I found out the issue was a Proxmox BIOS setting issue – Secure Boot must be disabled. To do this, while the VM is loading, keep hitting ‘esc’ to load the BIOS. Go into the menus Device Manager,  Secure Boot Configuration, and then Uncheck “Attempt Secure Boot”. Then restart, and the VM should come up! Images below:


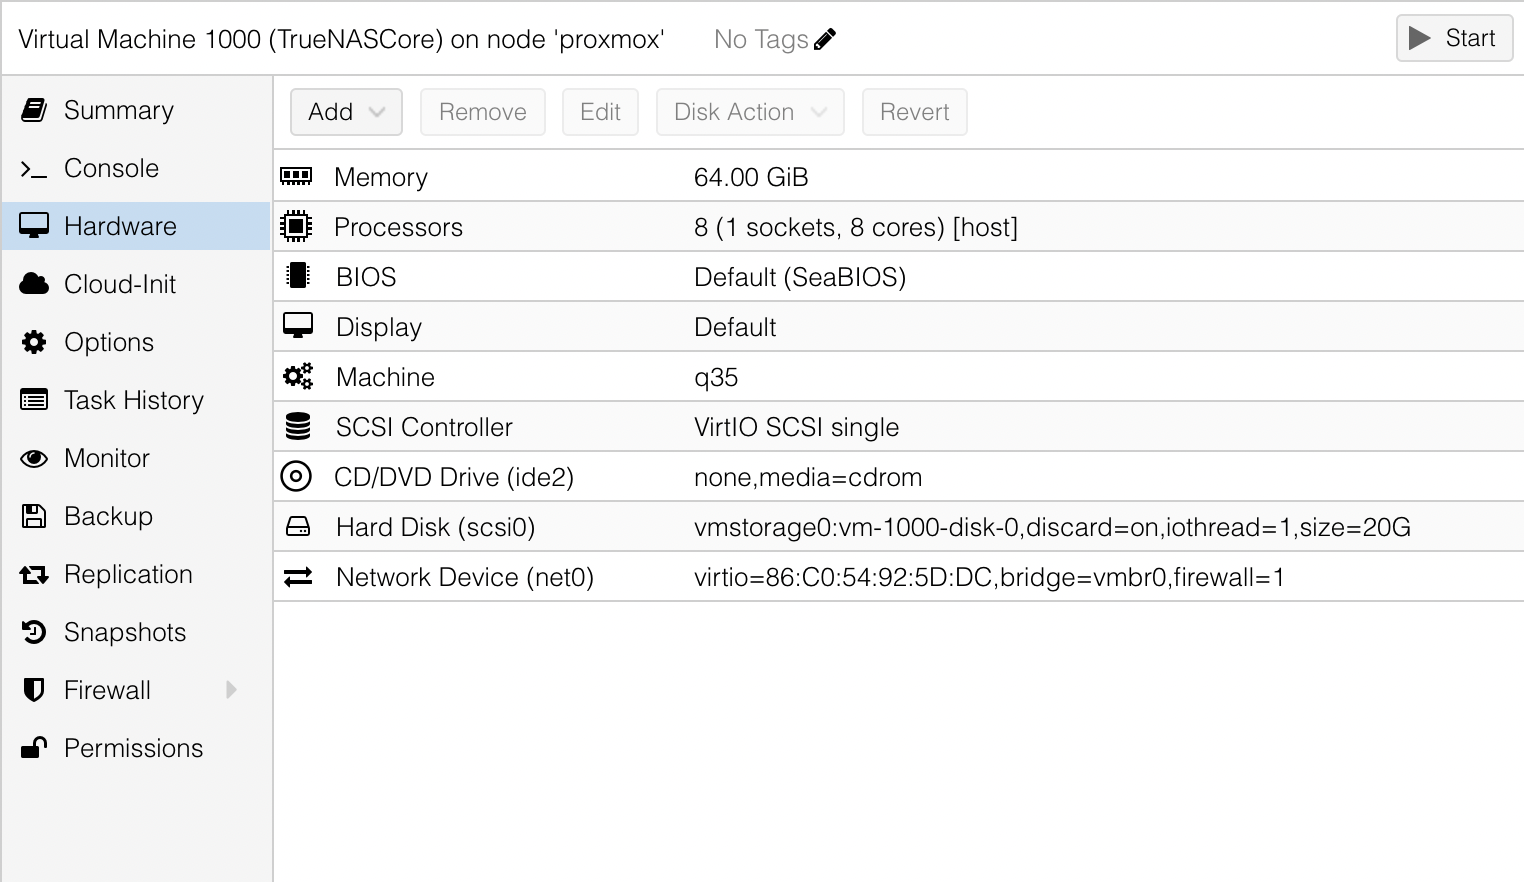
OK – so now we have TrueNAS Core working, but no drives! Buckle up, here’s where things get interesting.

As I said above, I wanted to pass my entire HBA controller to the VM; to do that, you have to add a PCI device:


From there, choose the HBA, and check PCI-Express. ROM-Bar should be unchecked, if there are any issues.


OK – now that’s set up, spin up the VM! In my case this did not work – it did not even get past booting. 

From here, this started a bunch of trial and error attempts to get it working.

First step was checking that VT-d was enabled in the BIOS. It was. VT-d allows the CPU to run virtualization.

The next two things I don’t remember which order, but I edited the file /etc/default/grub – so it read:
GRUB_CMDLINE_LINUX_DEFAULT=”quiet intel_iommu=on iommu=pt pcie_acs_override=downstream,multifunction” ; this didn’t work.


Next, I found an old post from 2014 that had an interesting fix.
https://forum.proxmox.com/threads/pci-passthrough.16483/post-98808
In the file – nano /etc/pve/qemu-server/1000.conf – you can edit the hostpci settings for what gets passed. On my VM, i added the ‘driver=vifo’ and the machine booted up! That line looked like this:
hostpci0: xx:xx.0,driver=vfio,pcie=1,rombar=off

I had to also update /etc/modules to include: 
vfio

vfio_iommu_type1
vfio_pci
vfio_virqfd

So – this actually got the VM to boot! Back to square one a bit, but at least theoretically the PCI is being passed. But, just as before, the drives didn’t show up.
Next, I ran: dmesg | grep mpt ; and got:  mpt2sas_cm0: LSISAS2308: FWVersion(14.00.00.00)
I found out that my card is up to version 20.00. So, now it’s time to update the firmware on the HBA. Even if this doesn’t help, it’s good to have the latest firmware. The HBA needs to be in IT mode, and not RAID, so I did my homework, and came up with a method. Please find out what settings you need before trying this on your own hardware:

1. Unplug ALL hard drives

2. Make a USB stick with FAT/FAT32 NOT exFAT or NTFS

3. Unzip and copy the files from the UEFI folder onto a USB stick

4. Boot the server and Hit F11 and booted into the UEFI Shell

5. Switched to the USB stick with “fa0:” command

6. Run SMC2308T.nsh and following the instruction to enter the last 9 digits/character of the SAS address.  

7. If you are having problem to enter the SAS address, please use the command below to set the controller SAS address.

      sas2flash.efi -o –sasadd “Controller SAS address”

      For example: sas2flash.efi -o –sasadd 5003048 0070a8b00

8. Reboot the system


From here, the HBA card was now on version 20! But unfortunately this did not fix the problem. I decided to remake the Virtual Machine, just in case some of the previous settings were causing problems.

OK – so finally, from an old post, someone recommended changing the HBA from ‘BIOS & OS’ mode to ‘OS Only’ mode. So I went back into the LSI Controller Settings and changed this:

I booted up Proxmox and made a brand new (UEFI) VM. Then I passed the PCI, as per above; I did not add any of the extra settings mentioned above. This worked!!! I was able to boot into TrueNAS Core, and all of the drives showed up.


OK – next step is to build the ZFS pool in RAID-Z1, and share it on my network, but that’s for another day.